Welcome Guest! To enable all features please Login or Register.

Notification

Icon
Error

Login


Take the time to read our Privacy Policy.

Bruvpig Offline
#1 Posted : Sunday, 8 May 2011 6:32:13 AM(UTC)
Bruvpig

Rank: Member

Reputation:

Groups: Registered
Joined: 19/01/2011(UTC)
Posts: 193

Was thanked: 2 time(s) in 2 post(s)
Thought I should upload some pickies of what keeping me off the streets at the moment.

Although, the aim is to keep me ON the streets when it's finished.

I have been hunting for a panel van for a few years, thought it could be handy, and when I got a windfall in pay due to being underpaid for almost a year, I decided to throw some money into a Brougham project that i have had here for some time.
As luck would have it I came across A van on eBay not too far away and went to have a look. I had wanted a HK-G series, as I have heaps of parts collected over 30 years.... Glad I did take that look......


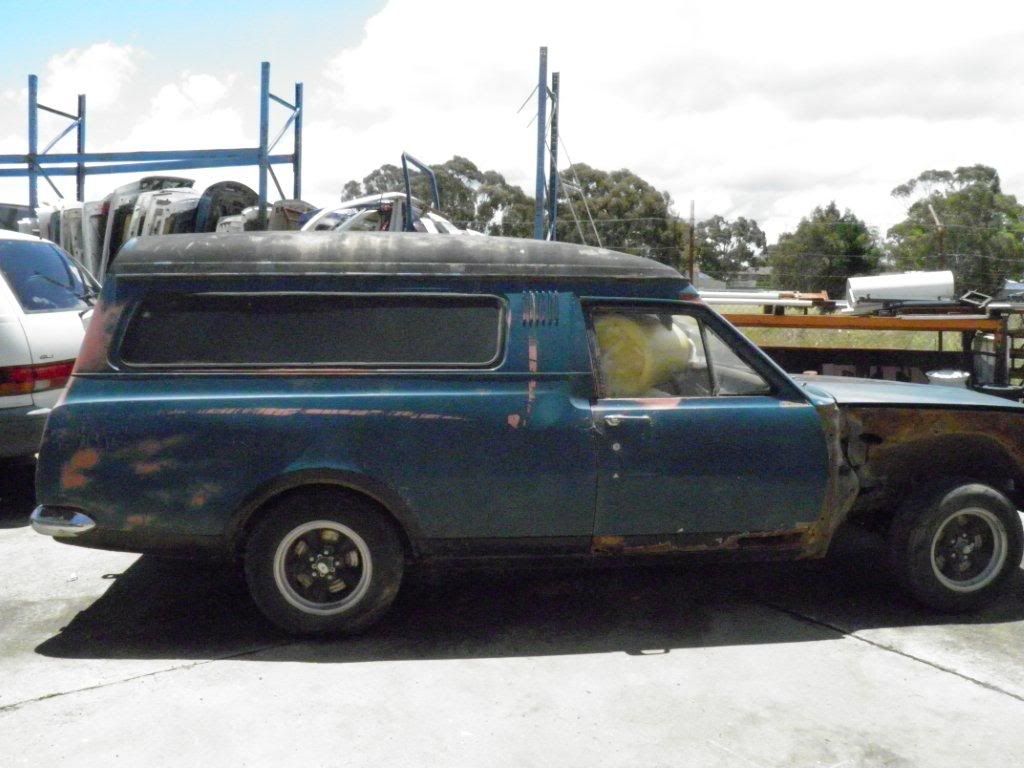
This is just some of the problems, but everything was like this.

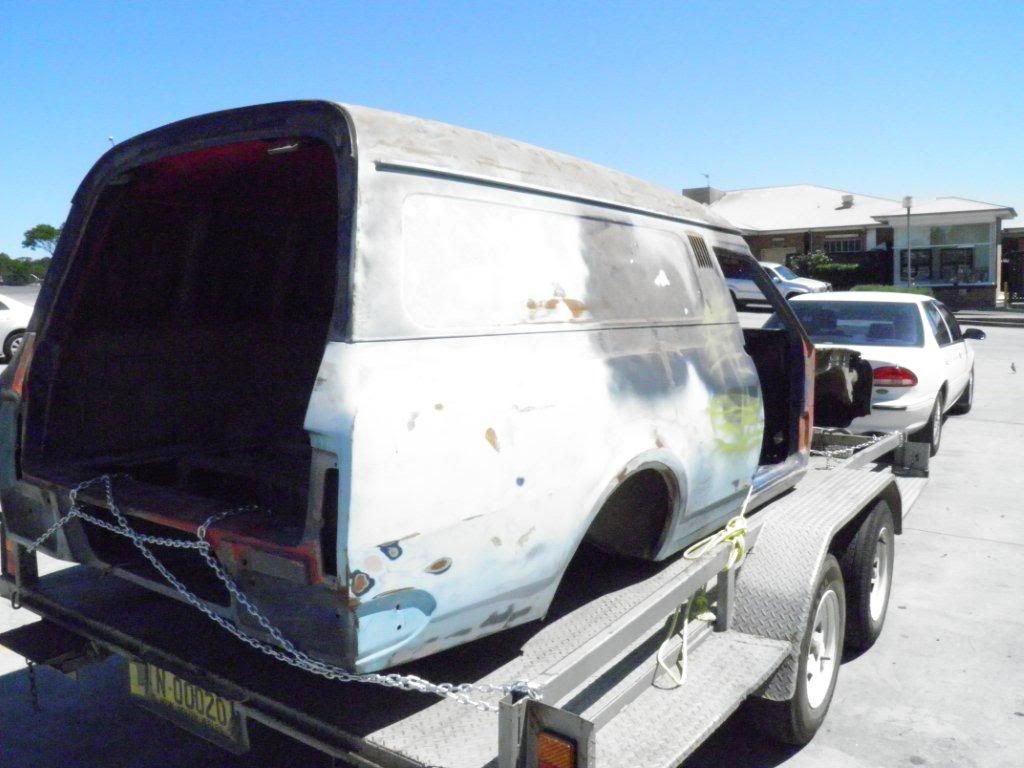
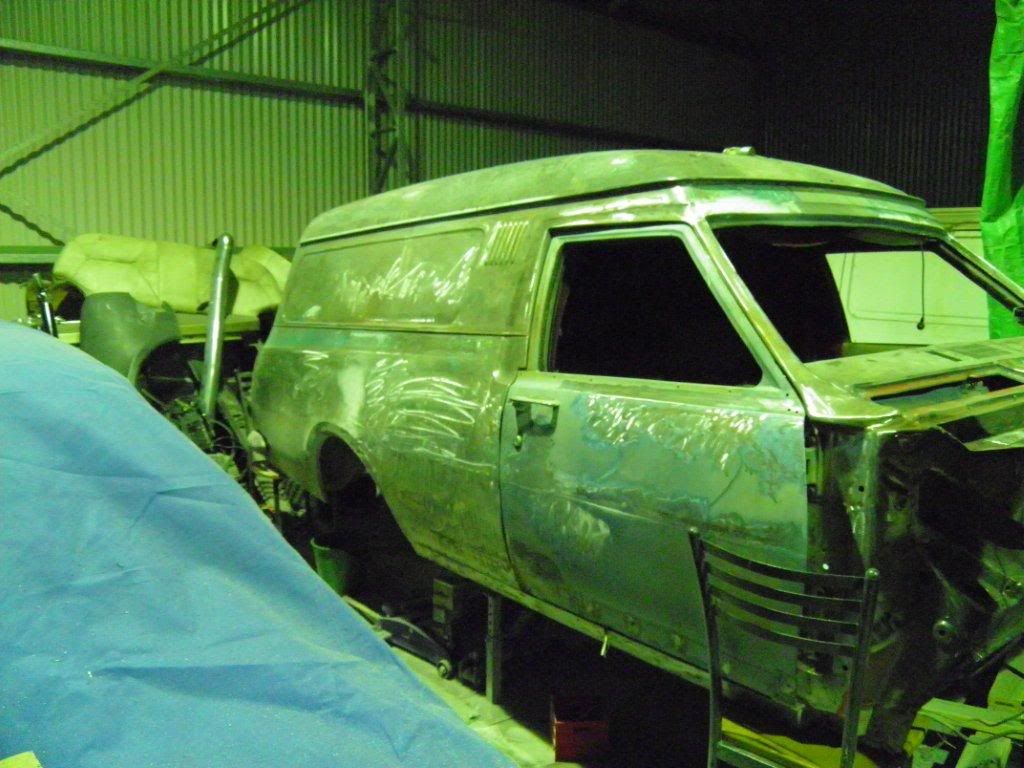
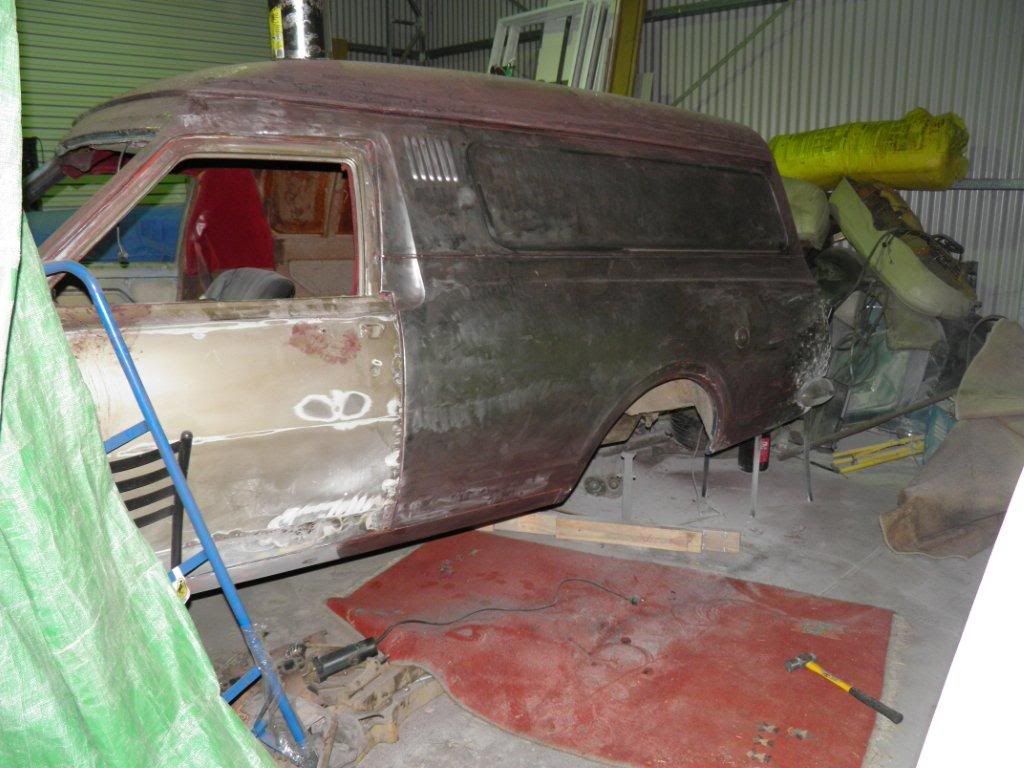
Then a "99% rust free" one came up (his words),
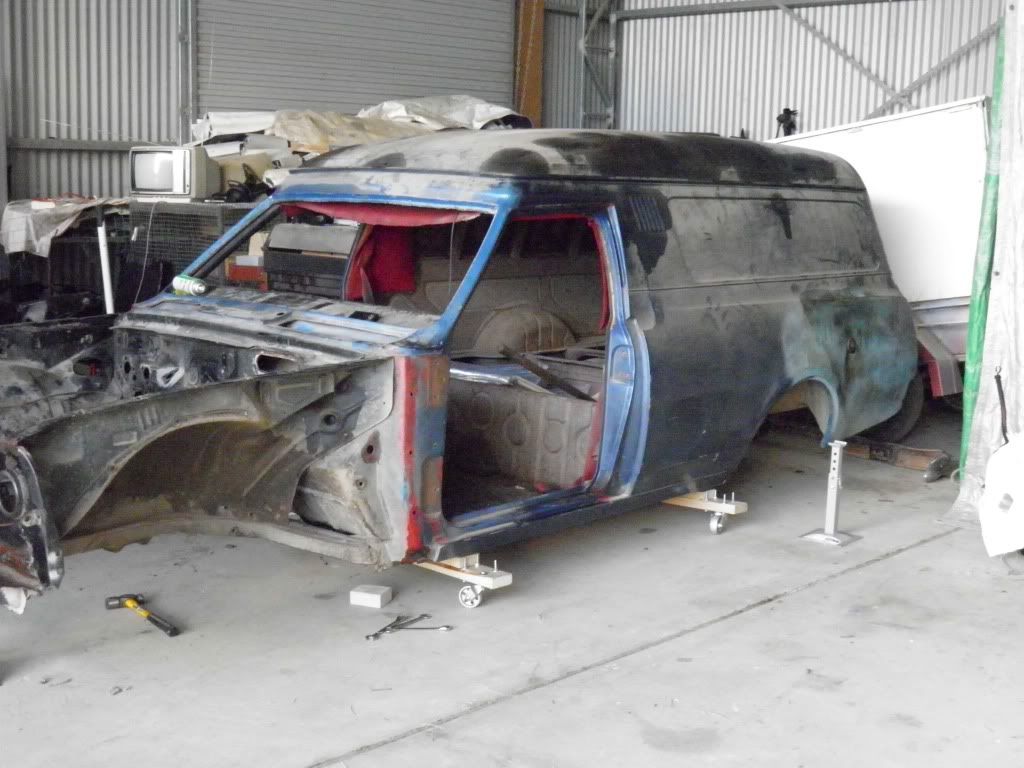
bare shell, but close by and the price was right, cheaper than the first.
Well it followed me home


Getting it into the shed


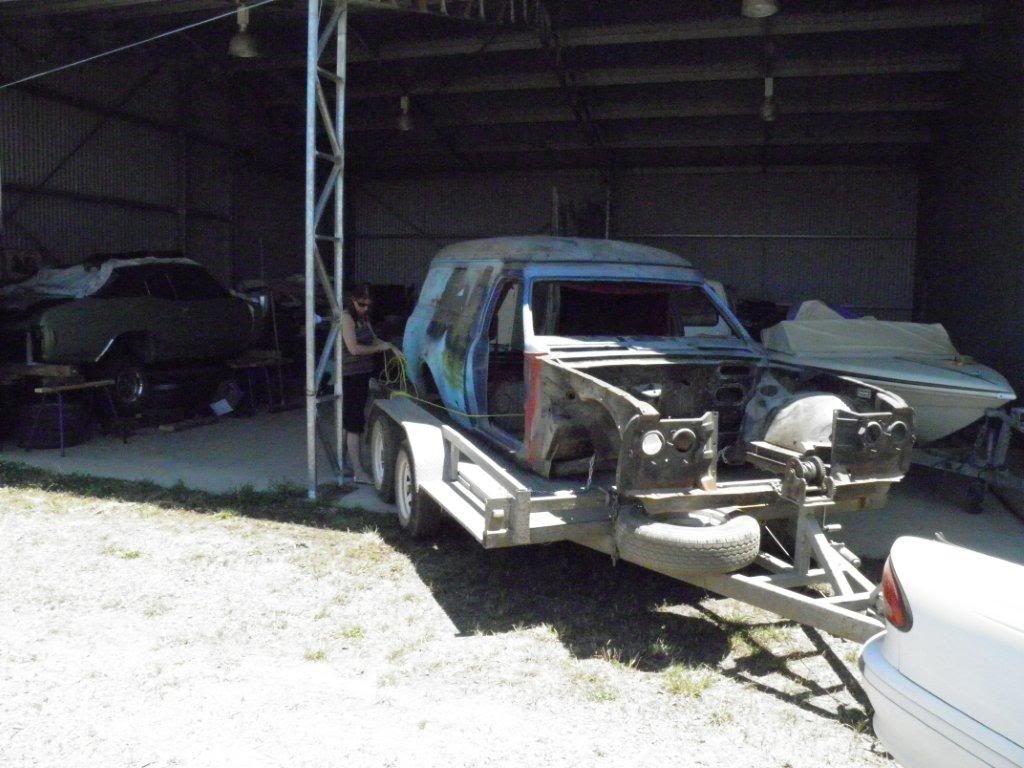
On some crude skates to move around the shed


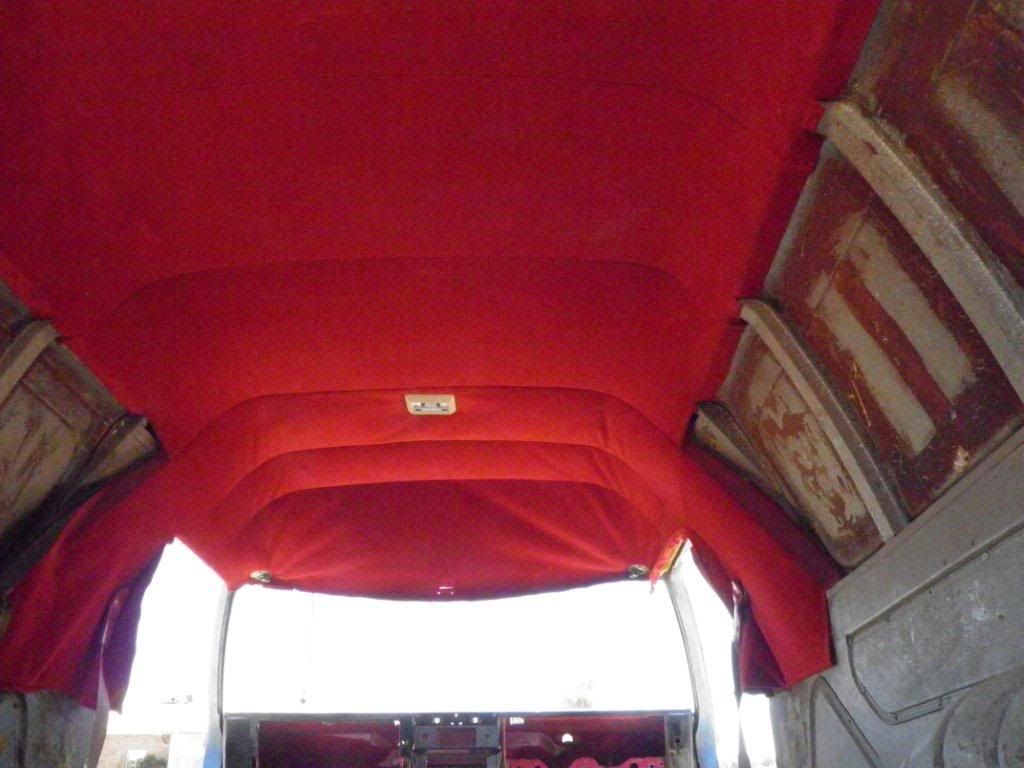
It was all class.... Sweet velour roof lining and matching red seatbelts, about the only thing on the shell besides the body wiring.


But it did come with a driver......


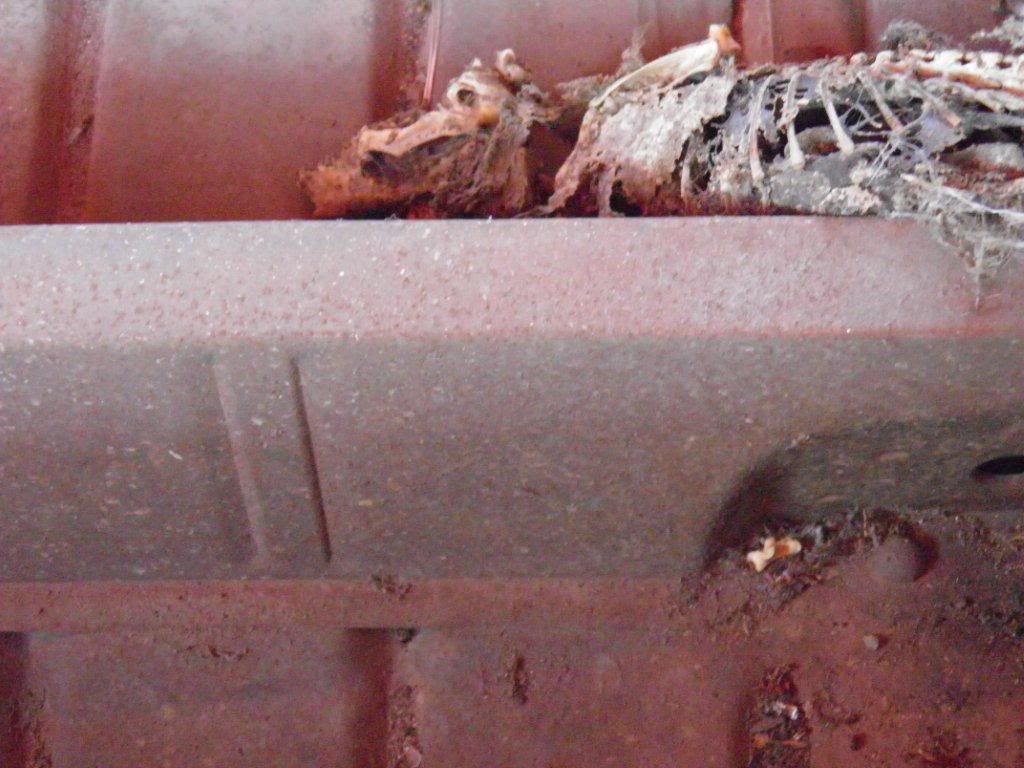
Albeit a little deceased.
I have the skull and the forearms (look like King Julian's sceptre) and I'll use them as toggle switches and an air cleaner hold down wingnut. Jeeez I'm classy.

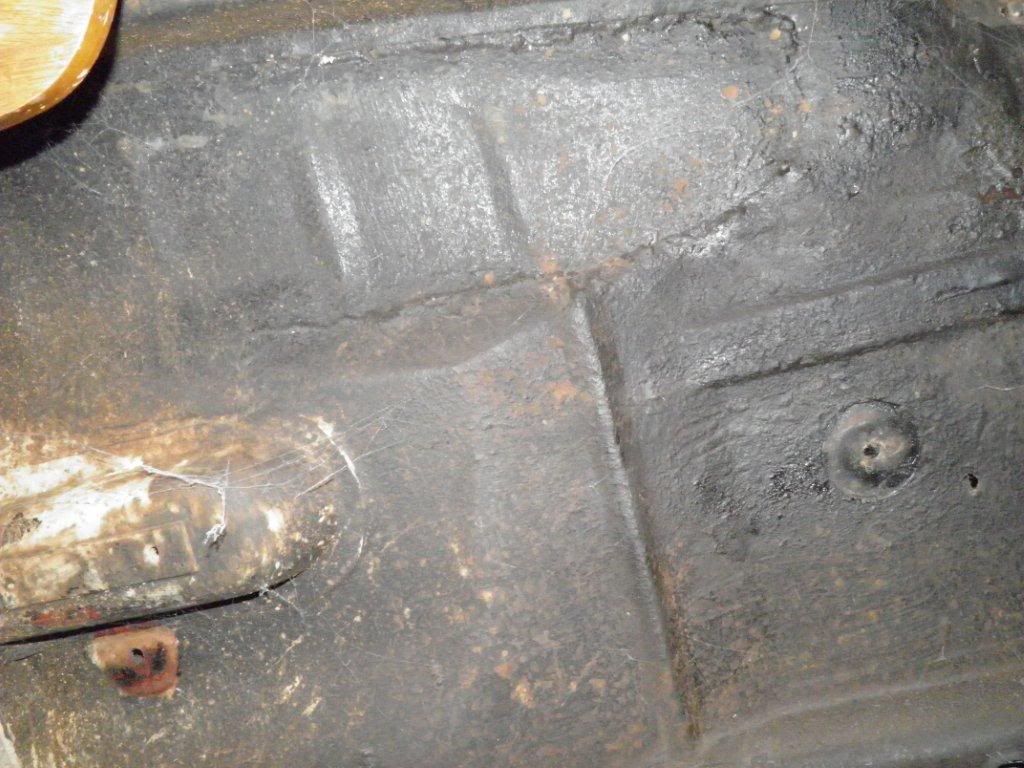
NO rust inside the cabin and tray area..


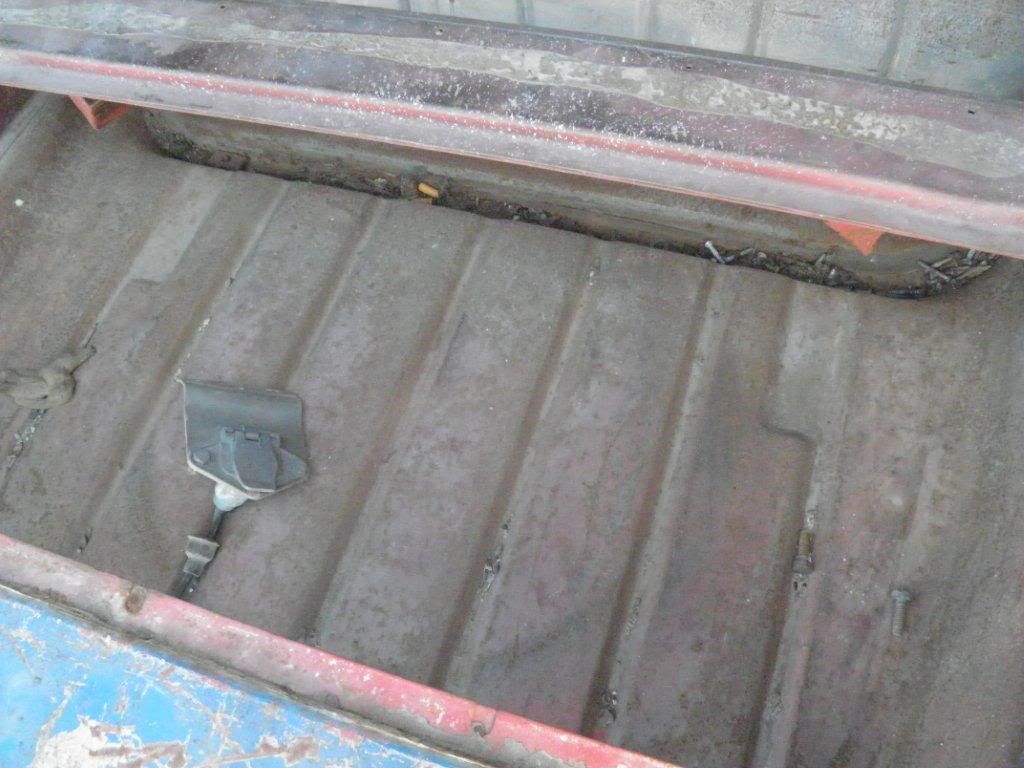
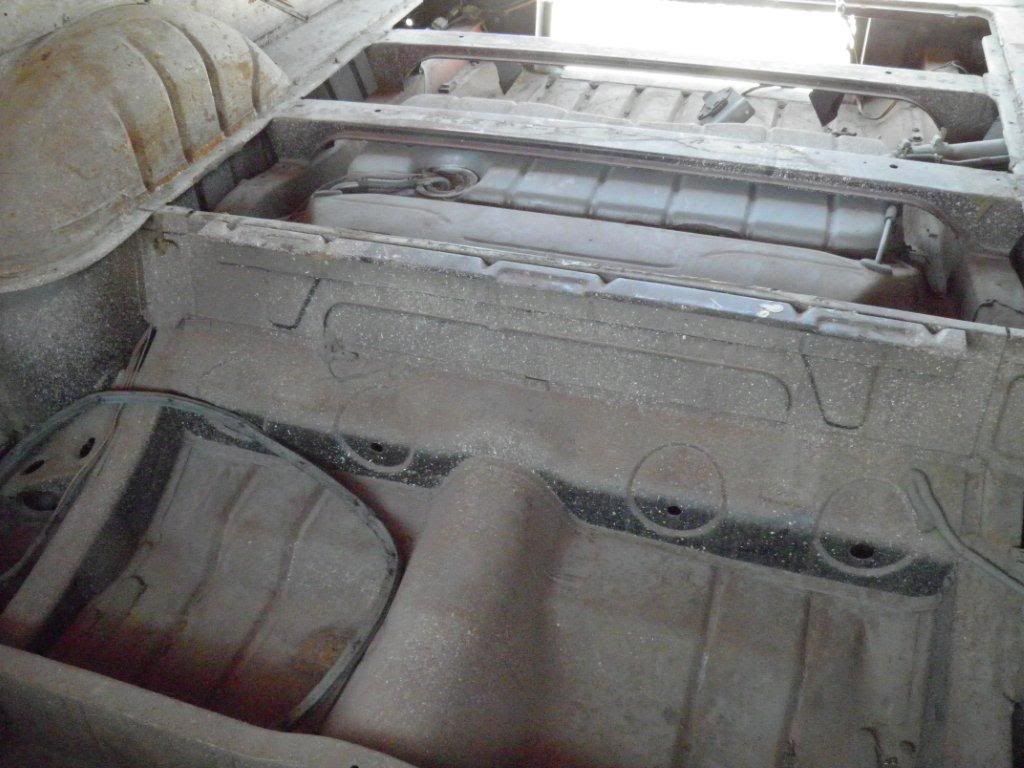
But this was the 4 speed conversion


So there will be a replacement welded in to clean this up. As it will be using the powertrain from a Brougham, the glide won't need the hole in the floor.

This is the sorry donor for the drivetrain, windows, doors, front panels and glass


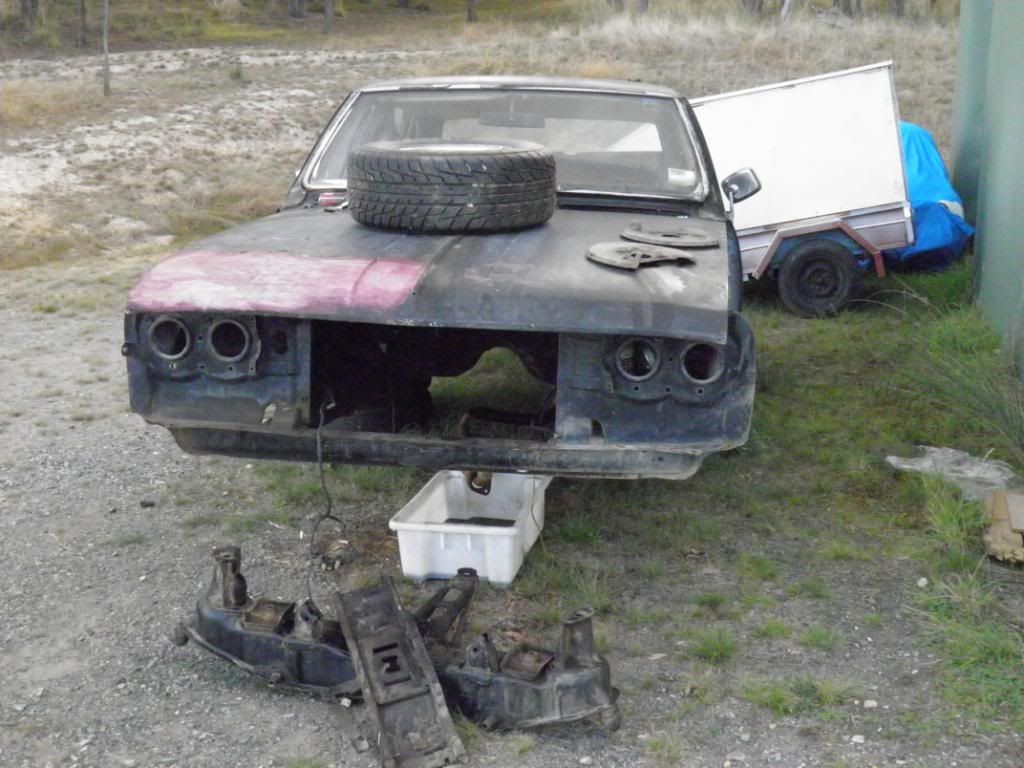
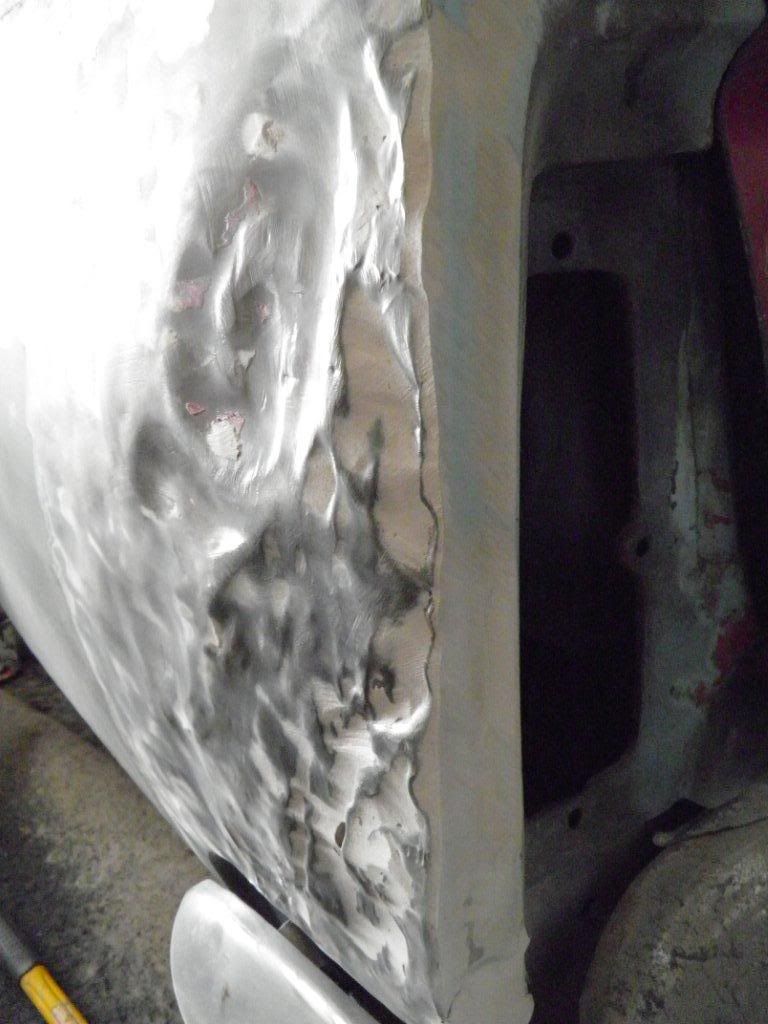
It was too much work to fix the substandard repairs on this one in a shortish time frame. This is some of the "work" done on it.


I'll get to this later, as I don't want to wreck a model in such short numbers.

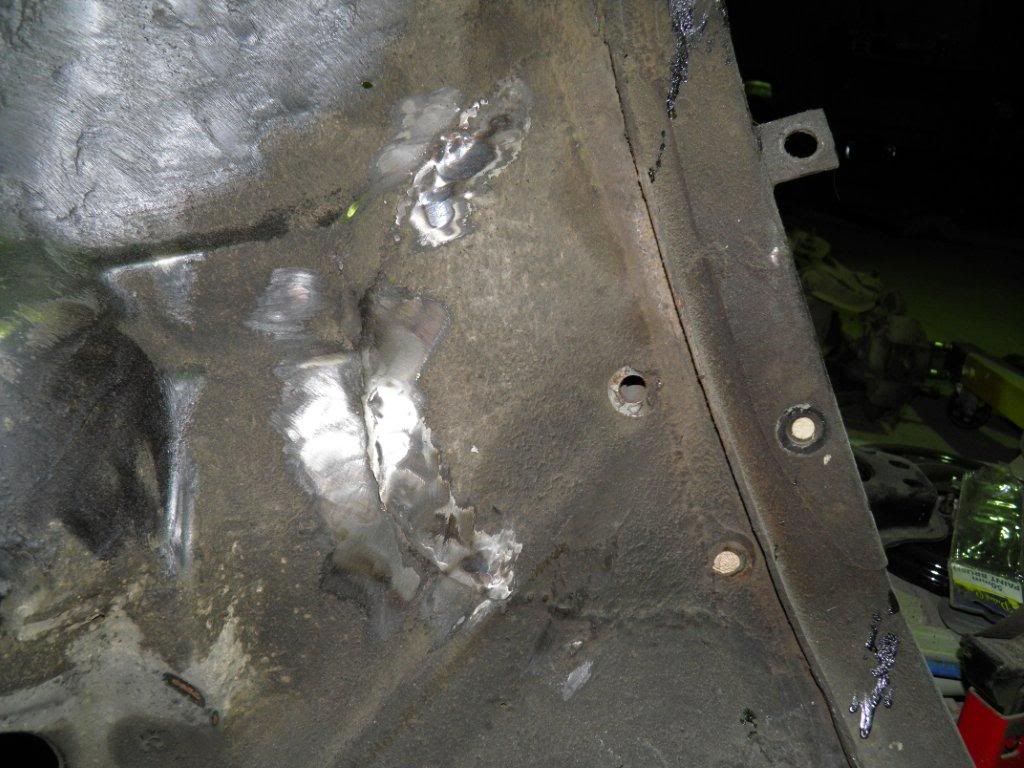
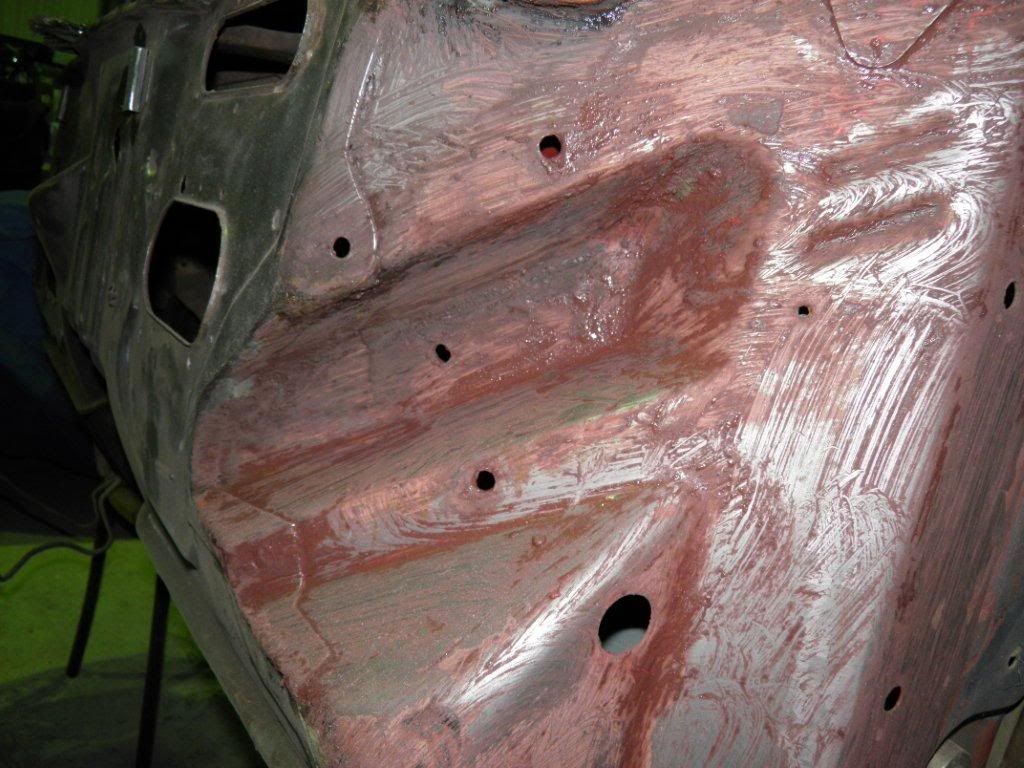
Previous repairs on the van were welded with reasonable skill, but some of the fitting and patch panel making required lots of bog i am starting to find.
This is a floor repair.


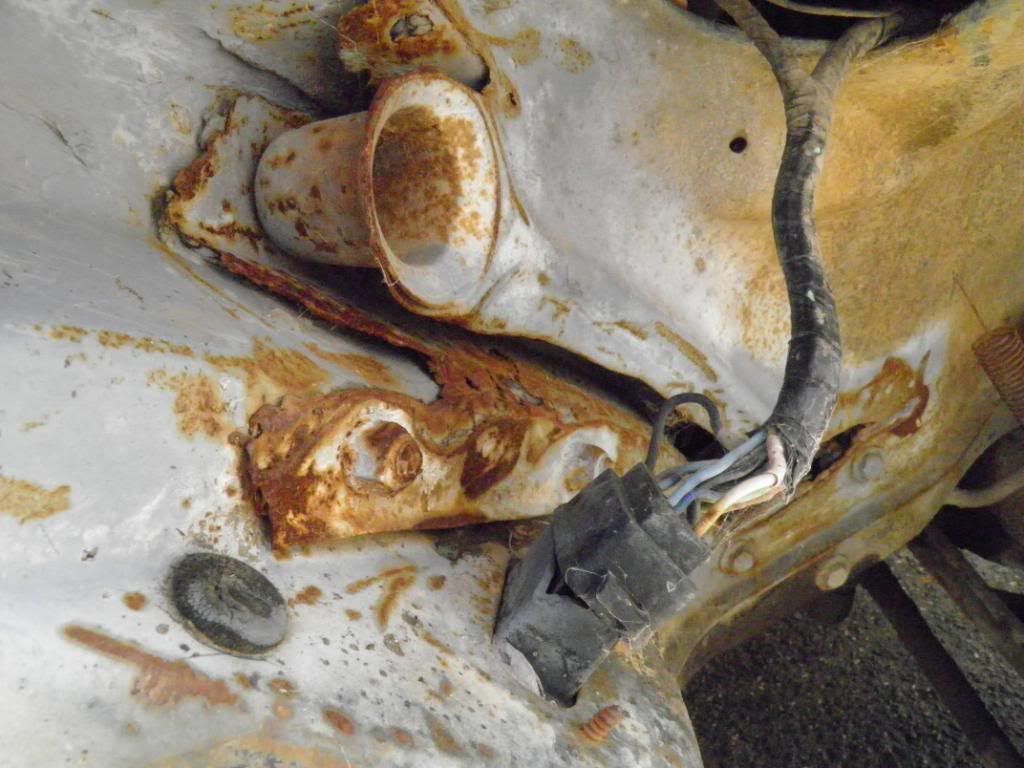
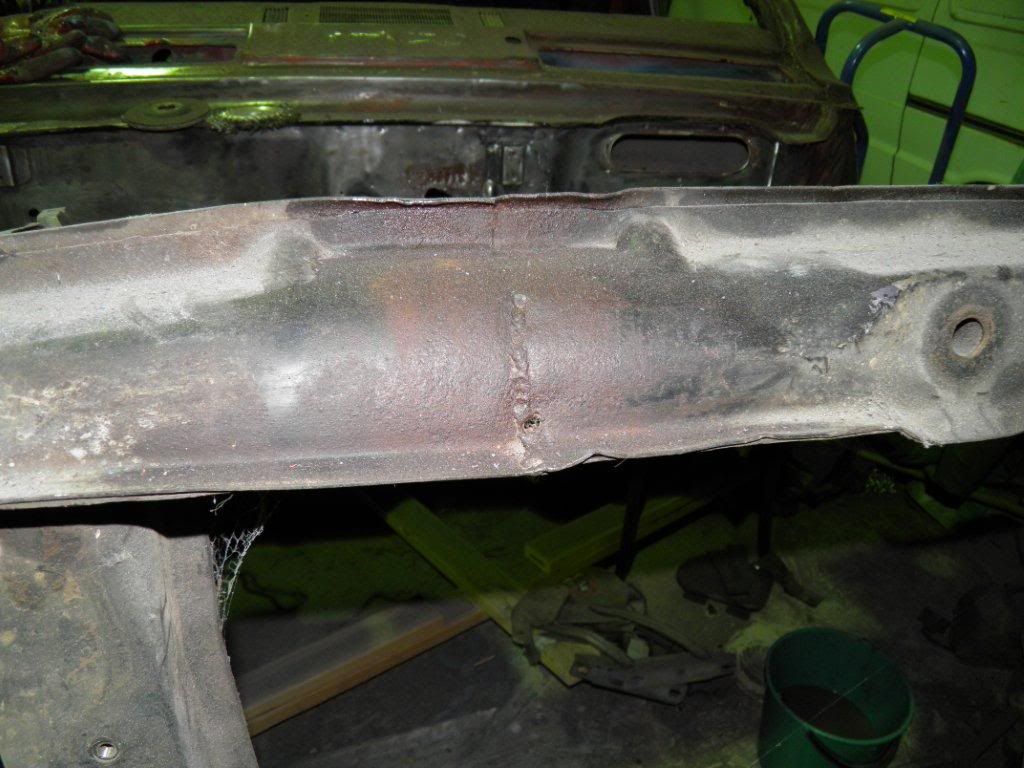
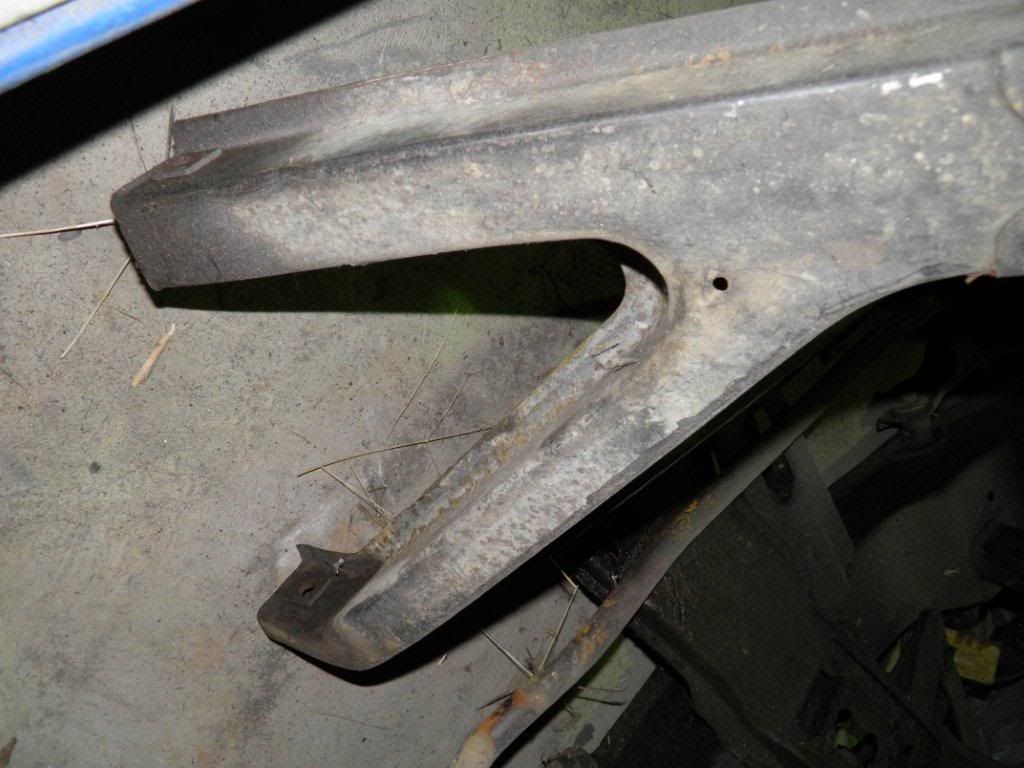
The outside of the sub frame near the steering box. The finish wasn't flush, but it was well protected, and the inside was seamless. I'll finish this one off and leave it.


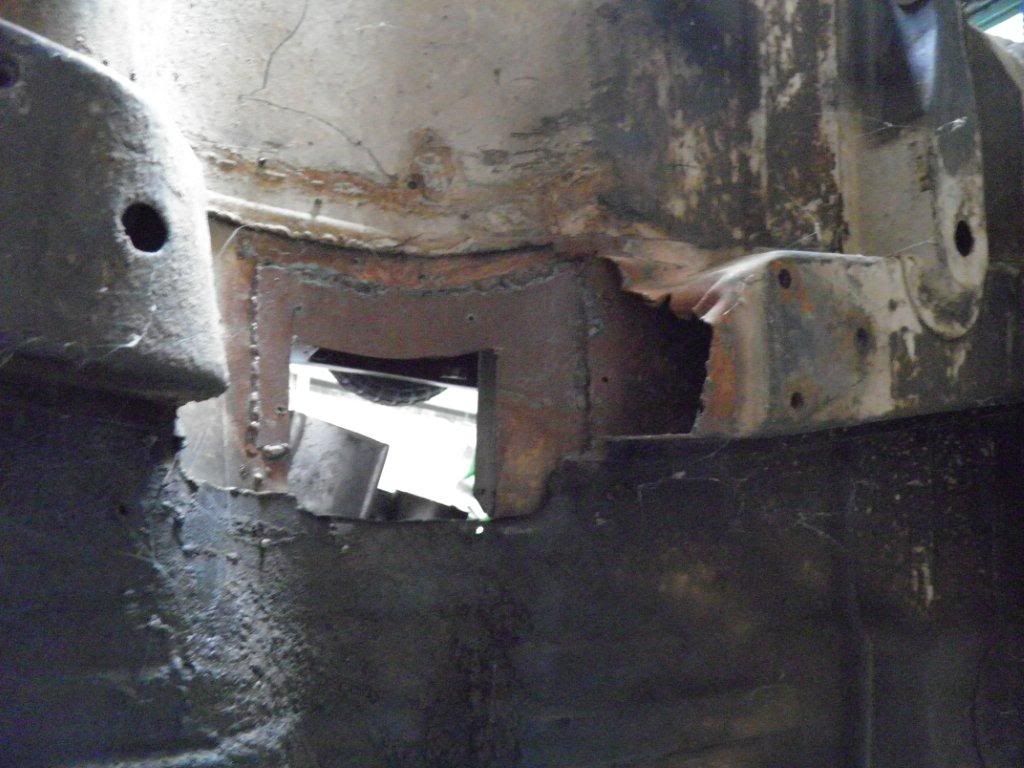
Look what I found when i tickled the frame with a wire brush....WHY cover it with bog, when the upper part of the frame had an excellent welded repair???
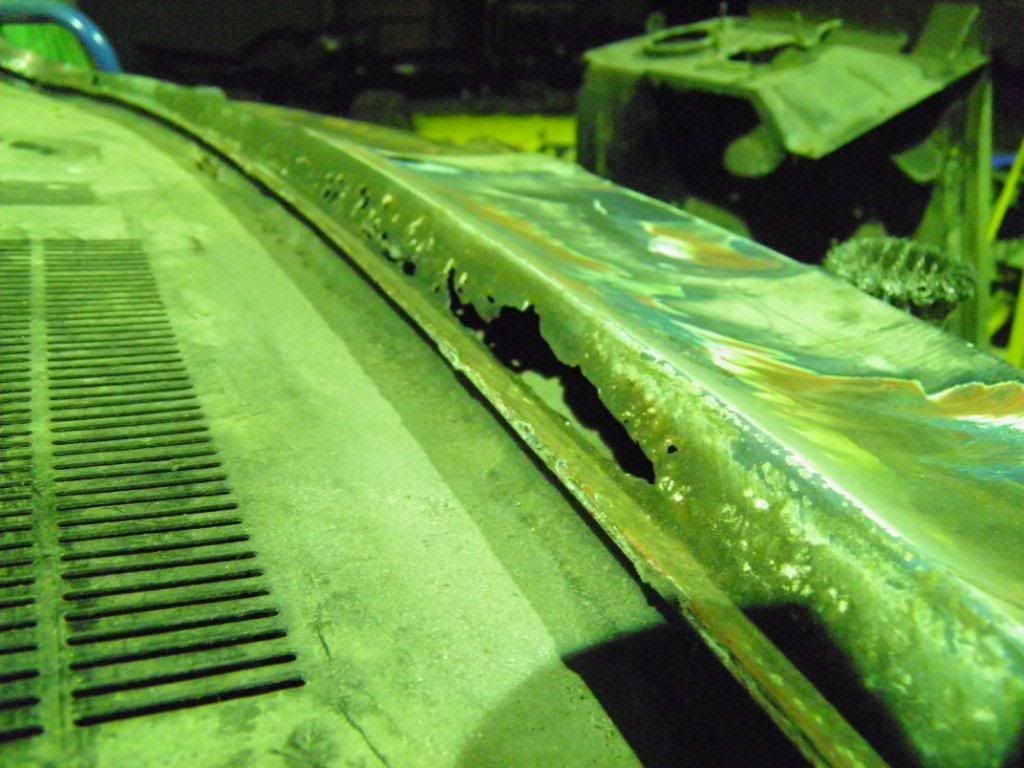
Well... there was no rust.... just no metal too!!

This was welded ok, but just didn't fit the profile of the panel


I'll make a new one and cut it out.

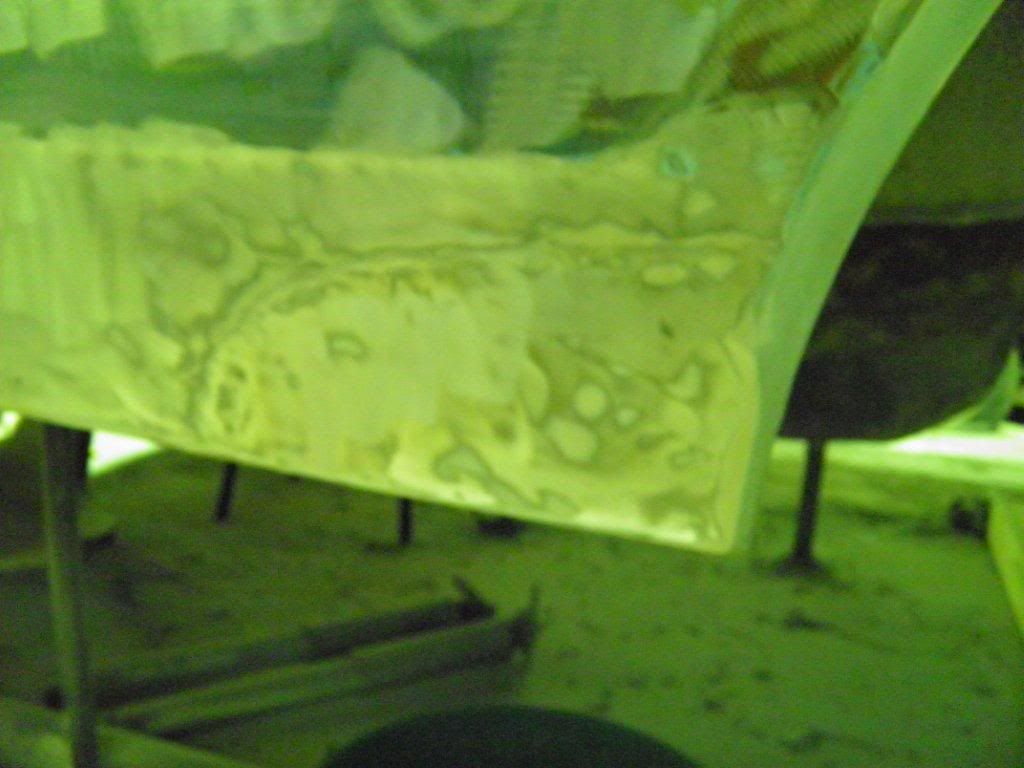
A cut and shut repair from something earlier. Tidy up needed, but I'll do that when the frame is back on the body.


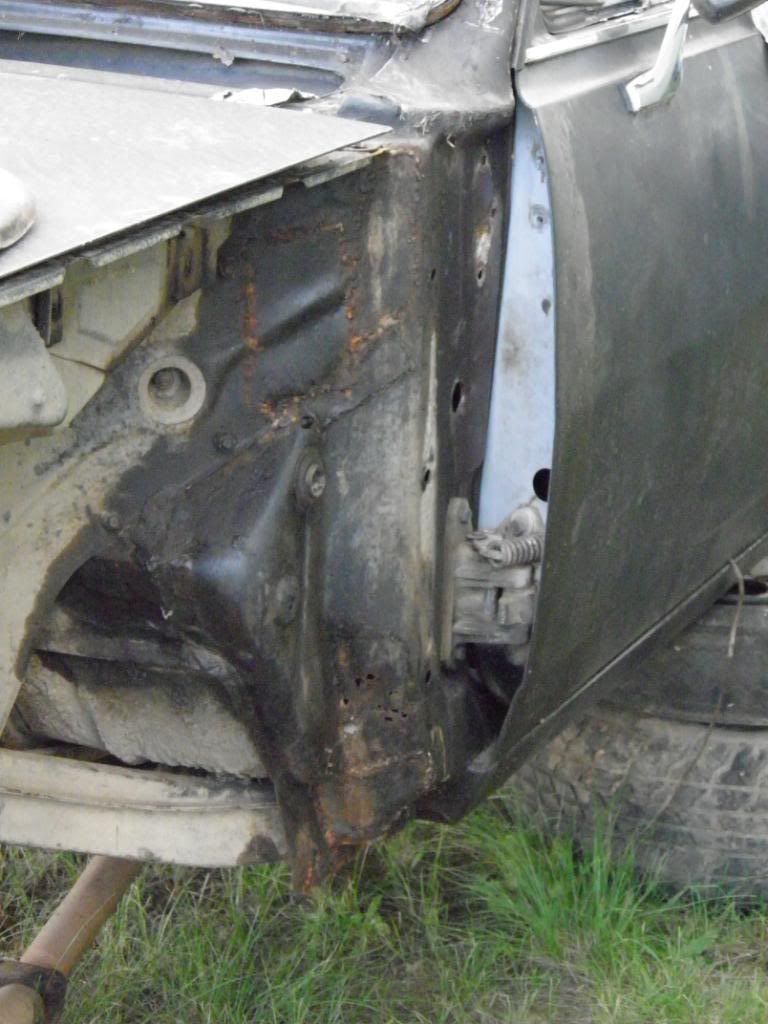
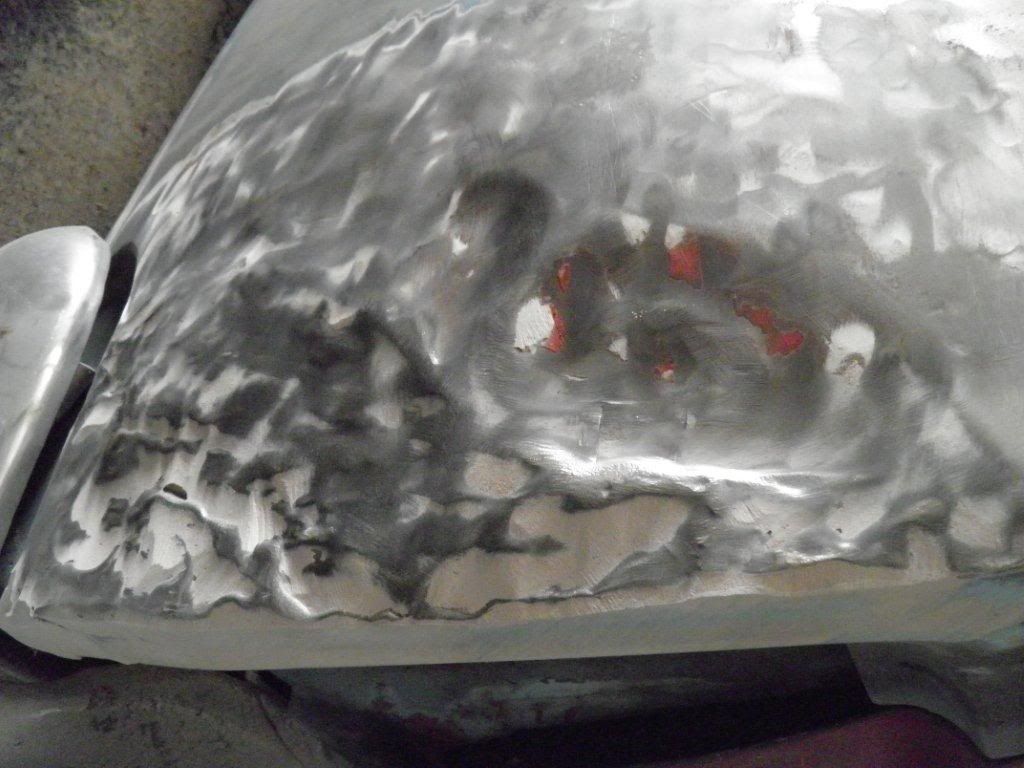
BIBI panel beating....bash in and bog it
Getting a new quarter section for this repair... too far gone. (Well it looked straight in the first inspection, and FAR better than the first one i looked at)


Stripping it down


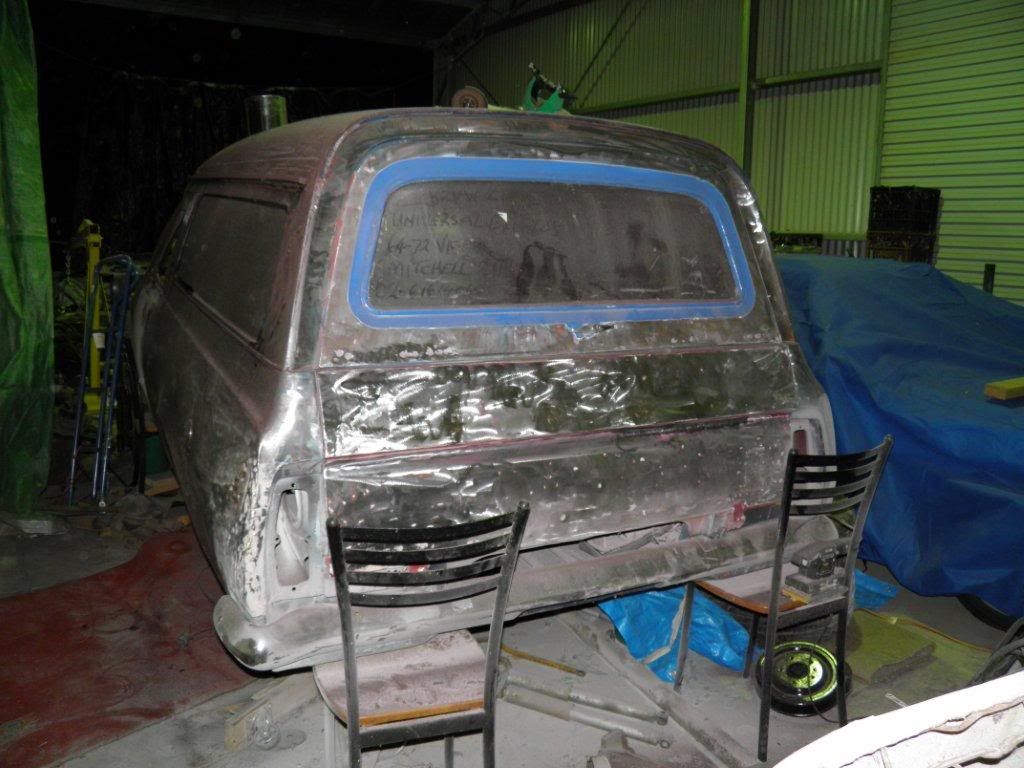
Going to put a sedan rear bumper on it(with a lot of fiddle)


There is absolutely no rust in the sub frame mounting areas, as well as the mounting legs.... unheard of..

They all look like this!!

Edited by user Sunday, 8 May 2011 7:11:47 AM(UTC)  | Reason: Not specified

Stepping stone or stumbling block...your choice
 1 user thanked Bruvpig for this useful post.
HG714 on 13/07/2018(UTC)
Bruvpig Offline
#2 Posted : Sunday, 8 May 2011 7:09:24 AM(UTC)
Bruvpig

Rank: Member

Reputation:

Groups: Registered
Joined: 19/01/2011(UTC)
Posts: 193

Was thanked: 2 time(s) in 2 post(s)
Had a play with photoshop to see if some newer style of wheels would suit.
Put the jellybeans into the frame and then some BMW ones. As I will be using the banjo for a while, the jellybeans will go on, but the BMW 16" will go on the VS diff that will be fitted later.
Love to get it this low, but I'm afraid it wont be legal, and I can't see the point of having to hide from every cop car I see.


It's a manual, so the clutch holes on the firewall will need to be filled along with the other holes that wont be needed, or the previous owner has made.


So here is where we stand at the moment...
The paint is off, the sides have been primered to keep off the sweat rust, and I have the donk ready to clean up.


I like the look of the quarter vent window missing, so I might play with a spare door to see what I can do to get this look.
You can see the drip rail is also missing(hope it did't blow off on the way home!!) so I will try and keep the lines clean on this one.


There are a few small dents to pull out, and then get onto the welding.
(sounds easy doesn't it??)

Will keep posting

Brian

Edited by user Sunday, 8 May 2011 7:49:02 PM(UTC)  | Reason: Not specified

Stepping stone or stumbling block...your choice
jpb308 Offline
#3 Posted : Sunday, 8 May 2011 8:11:57 AM(UTC)
jpb308

Rank: Member

Reputation:

Groups: Registered
Joined: 16/09/2009(UTC)
Posts: 358

Was thanked: 1 time(s) in 1 post(s)
So what's that odd thing towing the van Brian :)

Looks like fun times ahead.

Cheers

Jeremy
The G will roll again.... eventually
Bruvpig Offline
#4 Posted : Sunday, 8 May 2011 8:24:10 AM(UTC)
Bruvpig

Rank: Member

Reputation:

Groups: Registered
Joined: 19/01/2011(UTC)
Posts: 193

Was thanked: 2 time(s) in 2 post(s)
I can't knock it Jeremy, It has been very reliable, and it's on Gas, so it's cheap too.
But it will go when the van is on the road, as that will be 4, and I will struggle to justify it to the finance dept!
Stepping stone or stumbling block...your choice
playwme Offline
#5 Posted : Monday, 9 May 2011 8:12:41 AM(UTC)
playwme

Rank: Member

Reputation:

Groups: Registered
Joined: 4/07/2008(UTC)
Posts: 342

Good stuff.
I remember seeing that one on ebay a couple times. I'm in Canberra too and I reckon I would have bought it first time round if I'd had any spare cash at the time. It was bloody cheap for what it was.

Good to see it's getting some attention.
Bruvpig Offline
#6 Posted : Monday, 9 May 2011 10:38:31 AM(UTC)
Bruvpig

Rank: Member

Reputation:

Groups: Registered
Joined: 19/01/2011(UTC)
Posts: 193

Was thanked: 2 time(s) in 2 post(s)
Yes, I was surprised at what it went for. It certainly is a good start for a plaything despite the couple of problems.
I found another one the other day when trial fitting the leaf springs....one front hanging point is a HT for the big eye, and the other is original small eye. It has been replaced with rivets too and cant be picked as a repair, so I will have to go for HK springs, or replace the hanger.
Stepping stone or stumbling block...your choice
Bruvpig Offline
#7 Posted : Tuesday, 17 May 2011 6:58:19 AM(UTC)
Bruvpig

Rank: Member

Reputation:

Groups: Registered
Joined: 19/01/2011(UTC)
Posts: 193

Was thanked: 2 time(s) in 2 post(s)
Ok, here is some more progress on the Van.
Didnt get much done this weekend, as there was a lot of trimming and sculpting of the patch panels along with some measuring of the bits I need to fabricate for some of the patches to be welded in.


These are some pics of the diff cleaned up

Next the donor panel for the quarter panel. This is from a station wagon, (thanks Alex!!!) and whilst close, needs some cutting and sculpting to get the panelvan profile. I dont have pickies today of this, but will get them next time.


and the hole it will need to go into


still to trim the panel to fit the hole.


some pickies of the panels that I am going to fabricate and replace

And the only visable rust on the body....


and this is what it looks like at the moment:


More as I get the time.

Edited by user Sunday, 22 May 2011 2:33:17 AM(UTC)  | Reason: Not specified

Stepping stone or stumbling block...your choice
Bruvpig Offline
#8 Posted : Saturday, 21 May 2011 2:02:28 AM(UTC)
Bruvpig

Rank: Member

Reputation:

Groups: Registered
Joined: 19/01/2011(UTC)
Posts: 193

Was thanked: 2 time(s) in 2 post(s)
Here is the patch panel for the rear all dressed up and cut out.
I overlapped the patch on top of the Quarter, and used a saw to cut both panels together. The fit was quite good and made the welding easier.


Welded in and ready for cleaning up

Stepping stone or stumbling block...your choice
Bruvpig Offline
#9 Posted : Wednesday, 1 June 2011 7:27:19 AM(UTC)
Bruvpig

Rank: Member

Reputation:

Groups: Registered
Joined: 19/01/2011(UTC)
Posts: 193

Was thanked: 2 time(s) in 2 post(s)
Ok,
Got some time to do some work in the shed, here are the results.


Got a patch made up for the rust hole and welded it in.


welded in a panel to cover up the spare tyre door. This was a simple sheet rolled at one end to match the curve on the beaver panel, and a lip on the top end to blend into the top.
Spare tyre will be accessed from inside the van.


here is the sculpting that was done to get the wagon tail light piece to fit the panelvan.
still to be cleaned up

the bumper region

fits all right. and with a tickle from the grinder will look the goods. Lead all melted out from the join, and i'll replace with filler.


the rust in the tail gate. Will dunk in molasses after welding to get the inside rust.


the patch.


the finish


So how many holes do you need on a firewall??? I was going to clean up some of them anyway as there will be a glide & the car was a manual, but there were heaps of others drilled for goodness knows what.


Light coat of primer on it and all smooth.


put some putty on some of the scratches when i got tired of welding.


and played with a rim in the arch.


Here is the panel to fill in the 4 speed hole cut in the floor. i unpicked it, sanded off the surface grit and fitted it onto the crossmember. Using a saw, I cut both the spare and the one on the car to ensure the replacement would fit the hole.


Welded in


and from underneath


and the tunnel roughly in place. There is still a lot of welding to do on this to tidy up, and fill in the spot welds.


and some holes in the floor from bodgey bucket mounts.


So until i get some more time off, I'm making one more patch to fill in one last repair replacement, and then onto the front end.

Brian

Edited by user Thursday, 9 June 2011 6:45:58 AM(UTC)  | Reason: Not specified

Stepping stone or stumbling block...your choice
jpb308 Offline
#10 Posted : Wednesday, 1 June 2011 8:19:51 AM(UTC)
jpb308

Rank: Member

Reputation:

Groups: Registered
Joined: 16/09/2009(UTC)
Posts: 358

Was thanked: 1 time(s) in 1 post(s)
Busy weekend Brian :)
The G will roll again.... eventually
Bruvpig Offline
#11 Posted : Thursday, 9 June 2011 6:30:07 AM(UTC)
Bruvpig

Rank: Member

Reputation:

Groups: Registered
Joined: 19/01/2011(UTC)
Posts: 193

Was thanked: 2 time(s) in 2 post(s)
Didnt get called in today, so went out to the shed.. Thought i'd get the pressure washer onto some dirty bits.

What a stupid idea that was....wet my shoes and in the balmy 6 degrees and minus 6 wind chill...

So cracked open the oxy bottle and finished some welding

Finished off the trans tunnel and some holes made for bucket seats


What is it with holes on this car.... there were so many extra ones on the firewall and now...


Much better... looked sweet with the dolly applied later


And finished off the spare tyre "door"


Will probably play with the molasses tomorrow if i dont work, lots of rust to remove, and panels to recover.... (can't believe some of the rust repairs i've found.


Check out this before/after shot on a guard dipped in molasses for 10 days


Going to thaw out the rest of my body

Edited by user Thursday, 9 June 2011 7:29:05 AM(UTC)  | Reason: Not specified

Stepping stone or stumbling block...your choice
davequey74 Offline
#12 Posted : Saturday, 11 June 2011 5:54:18 AM(UTC)
davequey74

Rank: Veteran

Reputation:

Groups: Veteran, Registered
Joined: 25/11/2008(UTC)
Posts: 1,496

cool work man!
Bruvpig Offline
#13 Posted : Monday, 13 June 2011 8:21:06 PM(UTC)
Bruvpig

Rank: Member

Reputation:

Groups: Registered
Joined: 19/01/2011(UTC)
Posts: 193

Was thanked: 2 time(s) in 2 post(s)
Another cold day at the shed, Getting closer to dipping my hands in water.
Finished welding the panel to replace the rust on the subframe mount


got the rear tailight panel to a point where I can move on


and welded the patch onto the other side


a little bit of sanding to finish off, and I'll remember to bring some thinners out with me next time.

Forgot to weld up the aerial holes on the roof, so thats the next step, then onto the subframe.

Edited by user Monday, 13 June 2011 8:22:47 PM(UTC)  | Reason: Not specified

Stepping stone or stumbling block...your choice
Bruvpig Offline
#14 Posted : Tuesday, 21 June 2011 9:56:06 AM(UTC)
Bruvpig

Rank: Member

Reputation:

Groups: Registered
Joined: 19/01/2011(UTC)
Posts: 193

Was thanked: 2 time(s) in 2 post(s)
Some of the rust in the inside of the upper tailgate


I have this soaking in Molasses now as there was a lot of rust inside the frame, and I wanted to get to this before I put some new rust repair panels in.
There is also a "nice" fibreglass repair in the middle of the frame that will have to go. Another week in the brew, and I'll get on the bender to make up the panels.
Also reclaimed my front disks in the molasses.... you really ought to try it if you havent already!!....ready for the front end reconditioning.


If I dont get a call in tomorrow, its off to the shed again to strip the subframe.
Stepping stone or stumbling block...your choice
bullitljv8 Offline
#15 Posted : Sunday, 10 July 2011 4:01:14 AM(UTC)
bullitljv8

Rank: Member

Reputation:

Groups: Registered
Joined: 8/11/2008(UTC)
Posts: 401

doing a fantastic job there m8 keep up the great work another holden will be saved....
Bruvpig Offline
#16 Posted : Saturday, 23 July 2011 10:40:35 AM(UTC)
Bruvpig

Rank: Member

Reputation:

Groups: Registered
Joined: 19/01/2011(UTC)
Posts: 193

Was thanked: 2 time(s) in 2 post(s)
Thanks Bullit, maybe next year I can take it over to SA and use it for accommodation in the HK-G day!

Havent been doing much lately, but got out there today.

Filled all the holes in the subframe which was a real treat for me as it was about 8 degrees again.. nothing like the oxy to warm you up.


Then had a fiddle making up a Rotisserie out of old scrap I got from revolve. It's a bit rough to look at, but it will do the job nicely.
The center upright has a threaded bar going through it and can be raised or lowered with a spanner. (didnt get a shot of that , sorry)


The back one just needed a few mounting holes drilled to attach to the car.... but I broke the drill, which was all I needed to get out of the cold and come home. (-.5 on the climate control)
Stepping stone or stumbling block...your choice
Bruvpig Offline
#17 Posted : Sunday, 7 August 2011 8:19:20 AM(UTC)
Bruvpig

Rank: Member

Reputation:

Groups: Registered
Joined: 19/01/2011(UTC)
Posts: 193

Was thanked: 2 time(s) in 2 post(s)
Ok so now I have the drill fixed and was able to complete the Rotisserie. Here is the car on its side, it works a treat.


I then set about getting all the dirt and oil off the underside.
Can you spot the difference in the following pickies? There is absolutely no sign of repair on these.... puzzling indeed.


Painted the underside with a chassis sealer to make it all nice. Not interested in a show finish here, it's to be driven.


There is one more rust repair (covered in bog again!!!) But the Accetylene ran out So I'll leave it for a while


thats all I was able to do today.

Edited by user Sunday, 7 August 2011 8:22:57 AM(UTC)  | Reason: Not specified

Stepping stone or stumbling block...your choice
 1 user thanked Bruvpig for this useful post.
HG714 on 13/07/2018(UTC)
Users browsing this topic
Guest
Forum Jump  
You cannot post new topics in this forum.
You cannot reply to topics in this forum.
You cannot delete your posts in this forum.
You cannot edit your posts in this forum.
You cannot create polls in this forum.
You cannot vote in polls in this forum.

Powered by YAF | YAF © 2003-2024, Yet Another Forum.NET
This page was generated in 0.343 seconds.